Setup Opencode agent as your Neovim coding assistant. #
To setup opencode with neovim make sure you have the latest version of Neovim.
Opencode setup: #
Use the sudo-tee/opencode.nvim plugin for better UI. Although there are other Plugins, this one seems to have a clear and concise UI. I am using macOS, So I am pasting the command for installing from the Command Line.
Install:
curl -fsSL https://opencode.ai/install | bash
This installs the opencode as a CLI.
After Installation create a json file in the directory .config/opencode/opencode.json and create a schema as opencode by default looks for this opencode.json file. Here we can setup Our own config and choose our models.
Example schema:
   {
  "$schema": "https://opencode.ai/config.json",
  "agent": {
    "build": {
      "model": "openrouter/qwen/qwen3-coder-flash"
    },
    "plan": {
      "model": "openrouter/qwen/qwen3-coder-flash"
    }
  }
}
NOTE: See opencode models or !opencode models either in bash or inside nvim to see the available models. You MUST choose from the available models.
Connecting Openrouter Agent with Opencode: #
In this part any ‘Agent’ provider will work with the opencode.nvim plugin. For example you can use gemini pro models, and claude agent or literally any other provider.
How to Get any API key for Agentic Development ? #
Any API key is available to you when you sign up for any kind of plan regarding a coding agent. Correct place is to go to their official website and get started from there. Since most of the provider offers some kind of free tier service. Use that and judge accordingly.
- Go to “OpenRouter” to obtain free API key and a provider and store it inside
.zshrcfile and export their path. If you dont know what is
export OPENROUTER_API_KEY=**********
export PROVIDER="YOUR_PROVIDER"
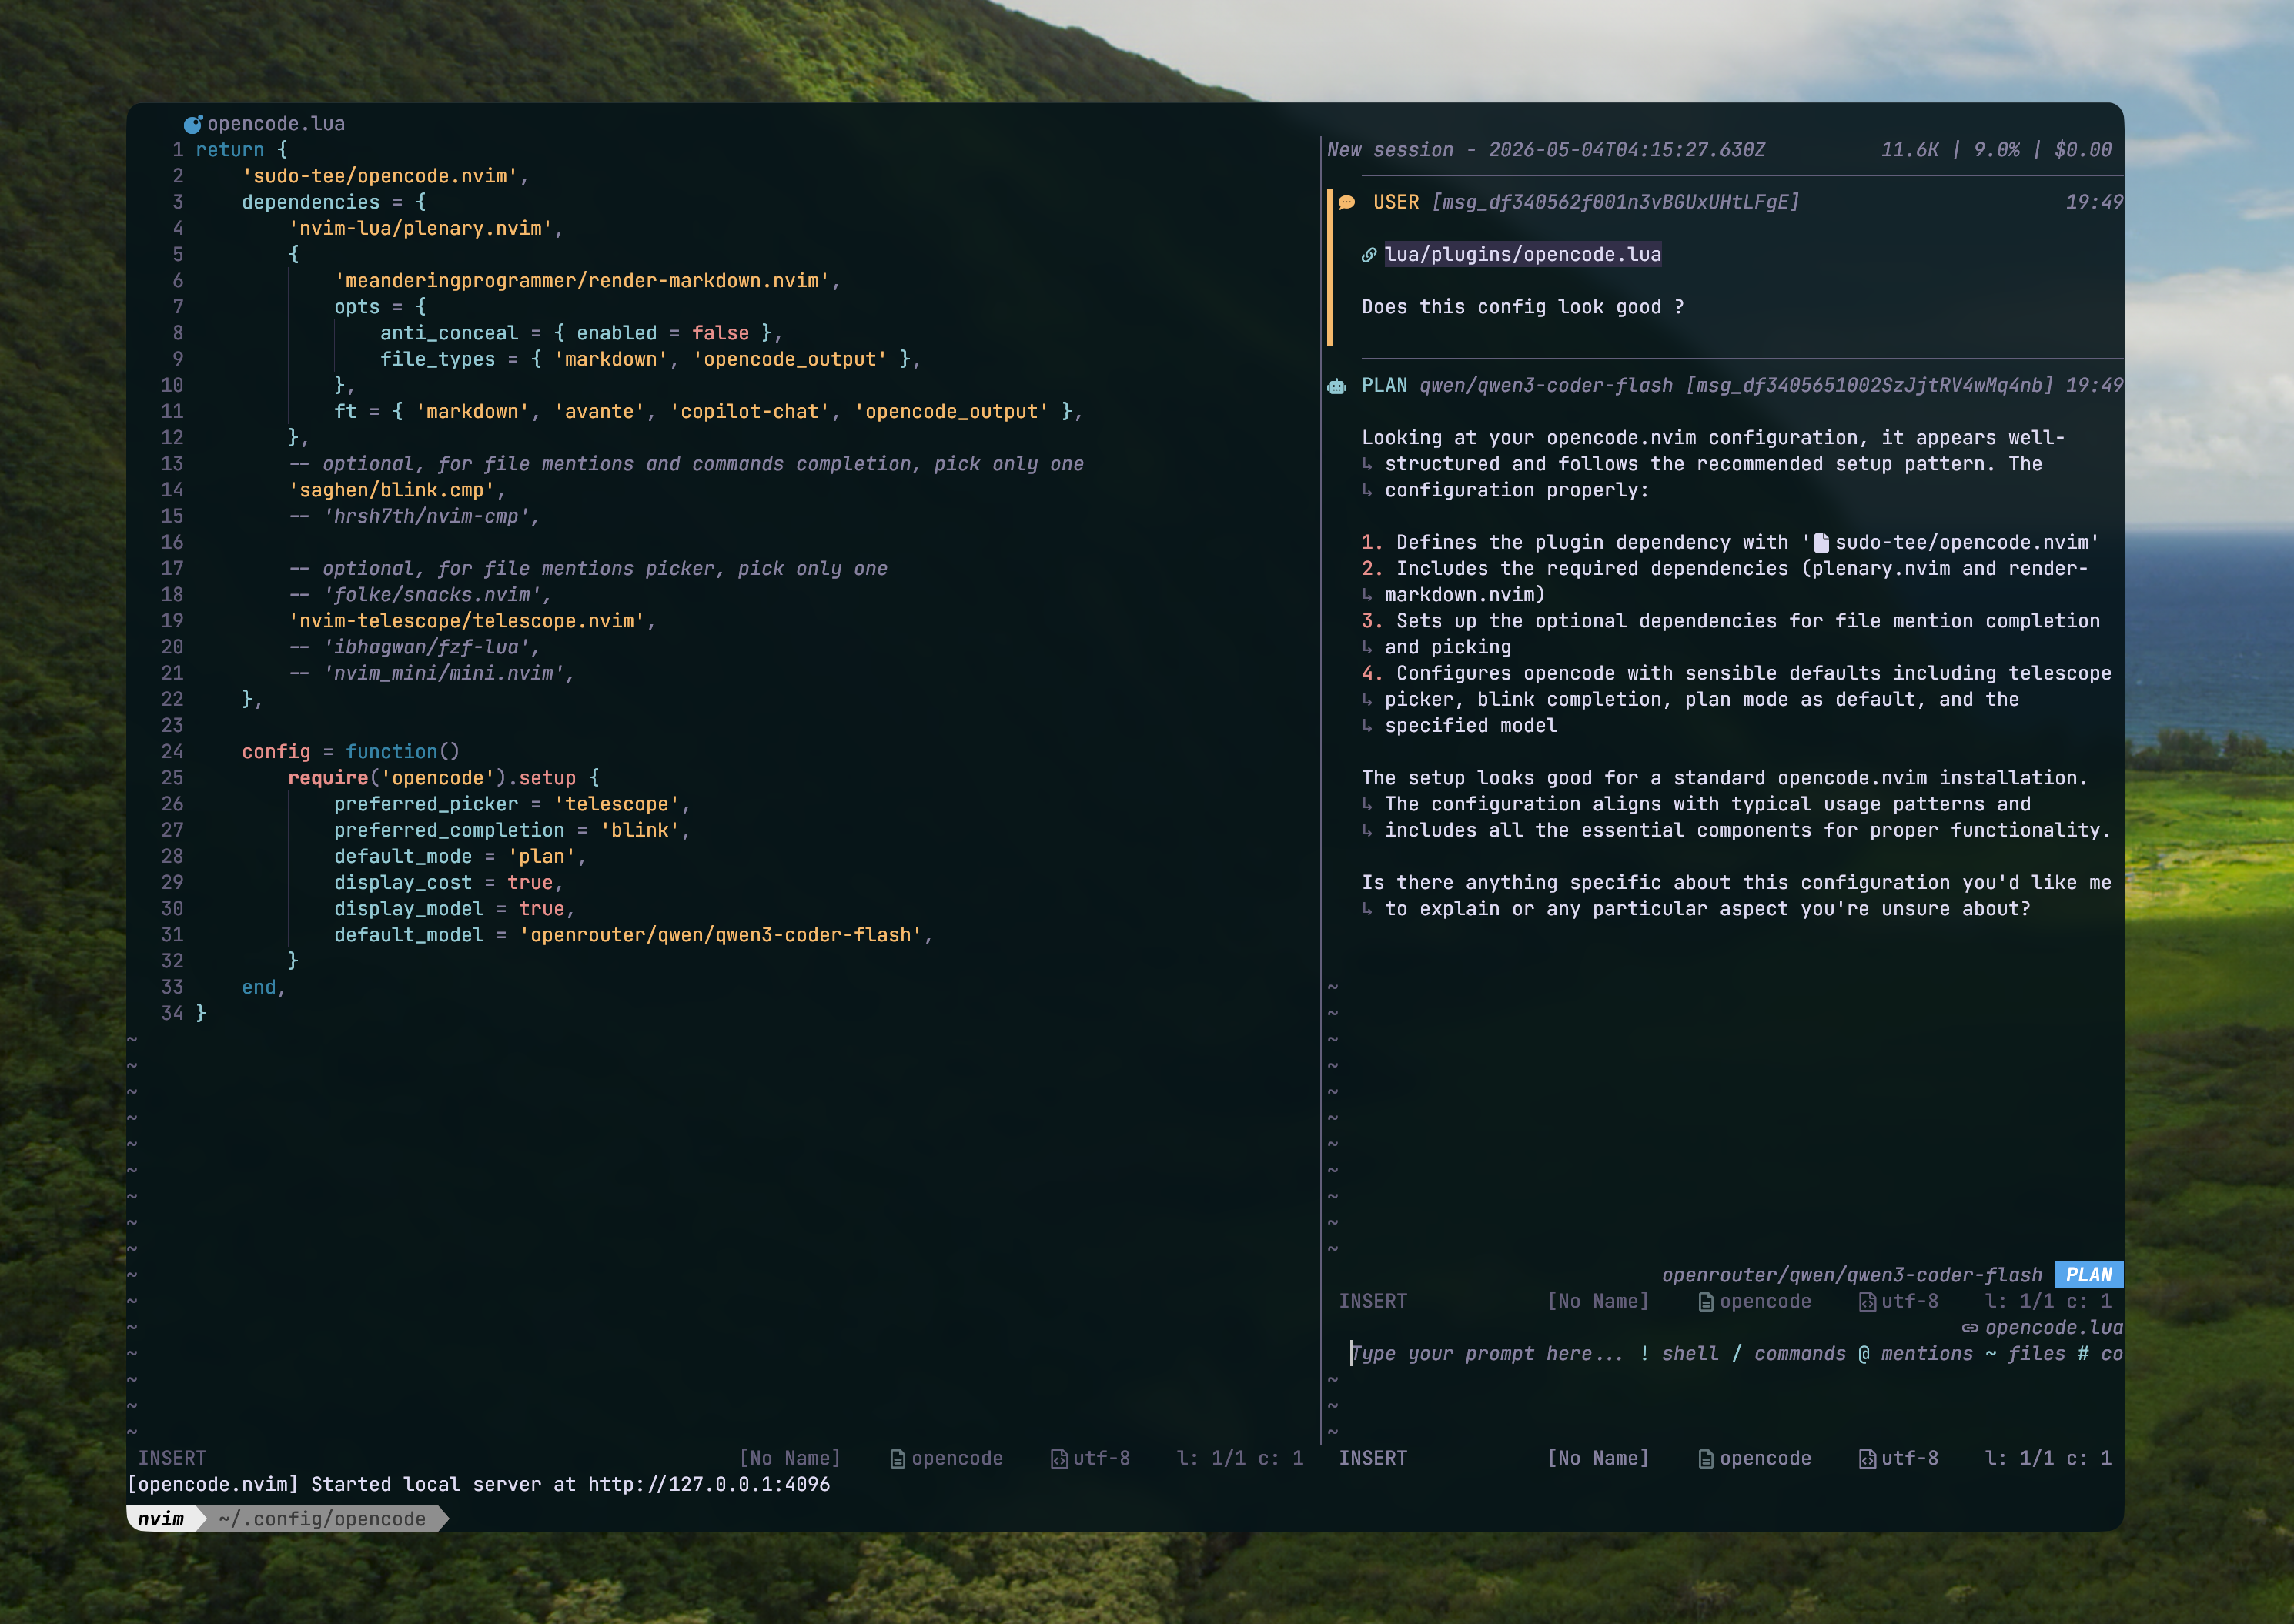
- Add the Model inside the nvim plugin config as well. I am using opencode.nvim by sudo-tee, This plugin has a great UI and layout that actually works for me, But there are other plugins out there. Make sure to match the model. Currently I am using the plugin from
sudo-teeExample lua file:
return {
    'sudo-tee/opencode.nvim',
    dependencies = {
        'nvim-lua/plenary.nvim',
        {
            'meanderingprogrammer/render-markdown.nvim',
            opts = {
                anti_conceal = { enabled = false },
                file_types = { 'markdown', 'opencode_output' },
            },
            ft = { 'markdown', 'avante', 'copilot-chat', 'opencode_output' },
        },
        -- optional, for file mentions and commands completion, pick only one
        'saghen/blink.cmp',
        -- 'hrsh7th/nvim-cmp',

        -- optional, for file mentions picker, pick only one
        -- 'folke/snacks.nvim',
        'nvim-telescope/telescope.nvim',
        -- 'ibhagwan/fzf-lua',
        -- 'nvim_mini/mini.nvim',
    },

    config = function()
        require('opencode').setup {
            preferred_picker = 'telescope',
            preferred_completion = 'blink',
            default_mode = 'plan',
            display_cost = true,
            display_model = true,
            default_model = 'openrouter/qwen/qwen3-coder-flash',
        }
    end,
}
Restart your nvim with :restart if you are on nvim 0.12. And Enjoy. Dont forget to go through the keymaps provided in the plugin. I use their default keymaps since its mostly mapped around the “o” key, which makes sense. Enjoy!